ARouter: 一个用于帮助 Android App 进行组件化改造的框架 —— 支持模块间的路由、通信、解耦
背景
在组件化架构中,各个组件之间解耦,互相之间无法访问其中的class,但是又需要组件之间能够进行必要的通信来满足部分业务场景,比如页面的跳转和接口的调用。
对于页面跳转,可以通过发送action的方式启动Activity,只要管理好action就好
对于接口调用,比如A组件调用B组件的一个方法,需要先抽象出一个接口放到base模块中,B组件通过ServiceLoader将具体的实现注册到其中,A组件运行时再从ServiceLoader中拿到具体的实现完成功能调用。
ARouter使用注解帮助我们简化上述两种场景,更便捷地完成组件之间的通信。
使用方式
- 依赖
dependencies {
  implementation 'com.alibaba:arouter-api:1.5.0'
  annotationProcessor 'com.alibaba:arouter-compiler:1.2.2'
}
ARouter的相关依赖包有三个:
- arouter-api 核心API
- arouter-annotation 注解类 (arouter-api已经间接依赖,不需要再单独依赖)
- arouter-compiler 注解处理器,在编译的时候根据注解来生成必要的java代码
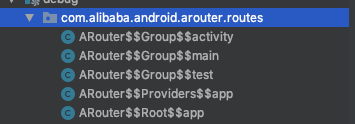
其中arouter-compiler主要是通过arouter-annotation提供的注解自动生成相关代码,代码最终生成路径在:
/build/generated/source/apt/debug/com/alibaba/android/arouter/routes路径下。
- 应用中初始化
if (isDebug()) {           // 这两行必须写在init之前,否则这些配置在init过程中将无效
    ARouter.openLog();     // 打印日志
    ARouter.openDebug();   // 开启调试模式(如果在InstantRun模式下运行,必须开启调试模式!线上版本需要关闭,否则有安全风险)
}
ARouter.init(mApplication); // 尽可能早,推荐在Application中初始化
对于页面跳转
- 在路由目标页面上添加注解
// 在支持路由的页面上添加注解(必选)
// 这里的路径需要注意的是至少需要有两级,/xx/xx
@Route(path = "/test/activity")
public class YourActivity extend Activity {
    ...
}
- 进行路由跳转
//跳转并携带参数
ARouter.getInstance().build("/test/activity")
            .withLong("key1", 666L)
            .withString("key3", "888")
            .withObject("key4", new Test("Jack", "Rose"))
            .navigation();
对于接口调用
- 首先在base模块中定义接口,必须继承IProvider接口
public interface IBInterface extends IProvider {
    void methodA();
    void methodB();
}
- B模块中实现接口,添加path
@Route(path = "/test/bImpl")
public class BImpl implements IBInterface {

    @Override
    public void methodA() {

    }

    @Override
    public void methodB() {

    }

    @Override
    public void init(Context context) {
        //do sth.
    }
}
- A模块中获取实现,进行调用
IBInterface bInterface = ARouter.getInstance().navigation(IBInterface.class);
bInterface.methodA();
源码流程分析
ARouter的源码其实十分简单,就几个核心的类。大致的原理是:在初始化的时候,建立一个Map映射(PATH -> 目标类的class对象),在使用的时候根据path来获得这个class对象,然后通过反射创建实例进行调用。
接下来就看一下一些核心的实现逻辑。
首先从使用的地方入手分析,简单地一句话背后做了什么事情?
ARouter.getInstance().build("/test/activity").navigation()
单例模式:
ARouter.getInstance() 使用双重检测锁实现了ARouter的单例,保证全局只有一个ARouter对象提供服务
ARouter#build
public Postcard build(String path) {
   return _ARouter.getInstance().build(path);
}

public Postcard build(String path, String group) {
   return _ARouter.getInstance().build(path, group);
}

public Postcard build(Uri url) {
   return _ARouter.getInstance().build(url);
}
可以看到其中的所有方法调用基本上都交给了_Arouter来做。
从ARouter的注释中可以看出作者想使用的是门面模式,ARouter是门面,_ARouter中实现了复杂的逻辑等。 但这里感觉怪怪的,因为门面类ARouter的每个方法中只是简单转发给了 _ARouter,而根据门面模式的定义,门面类会对外提供简单的接口,接口中封装多个复杂子系统的调用。显然这里没必要使用门面模式,可能作者当时考虑的太多?
_Arouter#build
protected Postcard build(String path) {
        //省略部分...
         PathReplaceService pService = ARouter.getInstance().navigation(PathReplaceService.class);
            if (null != pService) {
                path = pService.forString(path);
            }
            return build(path, extractGroup(path));
    }

protected Postcard build(String path, String group) {
        PathReplaceService pService = ARouter.getInstance().navigation(PathReplaceService.class);
        if (null != pService) {
            path = pService.forString(path);
        }
       return new Postcard(path, group);
}
_Arouter的build方法构造并返回了一个PostCard对象(明信片),这个明信片目前只是简单地包含了Group和Path信息。
其中Path即为 "/test/activity", Group为第一个/ /之间的内容,这里为test。 ARouter中利用分组来实现按需加载,在初始化的过程中并不会把所有的路由信息都加载完,而是先加载完分组的信息。等到需要某个分组的路由信息时,再将此分组下的所有路由信息加载到内存。
另外,PostCard类提供了一系列链式调用的方法来完善自身的数据(传递到其他组件的数据)
 public Postcard withString(@Nullable String key, @Nullable String value) {
        mBundle.putString(key, value);
        return this;
    }

    /**
     * Inserts a Boolean value into the mapping of this Bundle, replacing
     * any existing value for the given key.  Either key or value may be null.
     *
     * @param key   a String, or null
     * @param value a boolean
     * @return current
     */
    public Postcard withBoolean(@Nullable String key, boolean value) {
        mBundle.putBoolean(key, value);
        return this;
    }

    /**
     * Inserts a short value into the mapping of this Bundle, replacing
     * any existing value for the given key.
     *
     * @param key   a String, or null
     * @param value a short
     * @return current
     */
    public Postcard withShort(@Nullable String key, short value) {
        mBundle.putShort(key, value);
        return this;
    }
下一步,调用navigation完成路由。
PostCard#navigation
public Object navigation(Context context, NavigationCallback callback) {
    return ARouter.getInstance().navigation(context, this, -1, callback);
}
又进入_ARouter#navigation
protected Object navigation(final Context context, final Postcard postcard, final int requestCode, final NavigationCallback callback) {
        try {
            LogisticsCenter.completion(postcard);
        } catch (NoRouteFoundException ex) {
            logger.warning(Consts.TAG, ex.getMessage());

            if (debuggable()) { // Show friendly tips for user.
                Toast.makeText(mContext, "There's no route matched!\n" +
                        " Path = [" + postcard.getPath() + "]\n" +
                        " Group = [" + postcard.getGroup() + "]", Toast.LENGTH_LONG).show();
            }

            if (null != callback) {
                callback.onLost(postcard);
            } else {    // No callback for this invoke, then we use the global degrade service.
                DegradeService degradeService = ARouter.getInstance().navigation(DegradeService.class);
                if (null != degradeService) {
                    degradeService.onLost(context, postcard);
                }
            }

            return null;
        }

        if (null != callback) {
            callback.onFound(postcard);
        }

        if (!postcard.isGreenChannel()) {   // It must be run in async thread, maybe interceptor cost too mush time made ANR.
            interceptorService.doInterceptions(postcard, new InterceptorCallback() {
                /**
                 * Continue process
                 *
                 * @param postcard route meta
                 */
                @Override
                public void onContinue(Postcard postcard) {
                    _navigation(context, postcard, requestCode, callback);
                }

                /**
                 * Interrupt process, pipeline will be destory when this method called.
                 *
                 * @param exception Reson of interrupt.
                 */
                @Override
                public void onInterrupt(Throwable exception) {
                    if (null != callback) {
                        callback.onInterrupt(postcard);
                    }

                    logger.info(Consts.TAG, "Navigation failed, termination by interceptor : " + exception.getMessage());
                }
            });
        } else {
            return _navigation(context, postcard, requestCode, callback);
        }

        return null;
    }
这个方法中基本包含了路由的整个过程:
1、LogisticsCenter.completion(postcard); 继续完善路由信息,之前的路由信息只有path和group,并不知道目标类是哪个,这一步就是完善这些信息,找到最后路由哪个对象。
2、 degradeService.onLost(context, postcard); 全局降级服务。找不到路由时能够使用降级服务进行一些处理。
3、interceptorService.doInterceptions(…) 拦截器处理,如果没有拦截最终调用_navigation()进行最后的路由操作。
细化一下上面的步骤:
LogisticsCenter#completion(postcard);
public synchronized static void completion(Postcard postcard) {
        RouteMeta routeMeta = Warehouse.routes.get(postcard.getPath());
        if (null == routeMeta) {    // Maybe its does't exist, or didn't load.
            Class<? extends IRouteGroup> groupMeta = Warehouse.groupsIndex.get(postcard.getGroup());  // Load route meta.
                    IRouteGroup iGroupInstance = groupMeta.getConstructor().newInstance();
                    iGroupInstance.loadInto(Warehouse.routes);
                    Warehouse.groupsIndex.remove(postcard.getGroup());
                completion(postcard);   // Reload
            }
        } else {
            postcard.setDestination(routeMeta.getDestination());
            postcard.setType(routeMeta.getType());
            postcard.setPriority(routeMeta.getPriority());
            postcard.setExtra(routeMeta.getExtra());
        	//省略...
         }

            switch (routeMeta.getType()) {
                case PROVIDER:  // if the route is provider, should find its instance
                    // Its provider, so it must implement IProvider
                    Class<? extends IProvider> providerMeta = (Class<? extends IProvider>) routeMeta.getDestination();
                    IProvider instance = Warehouse.providers.get(providerMeta);
                    if (null == instance) { // There's no instance of this provider
                        IProvider provider;
                        try {
                            provider = providerMeta.getConstructor().newInstance();
                            provider.init(mContext);
                            Warehouse.providers.put(providerMeta, provider);
                            instance = provider;
                        } catch (Exception e) {
                            throw new HandlerException("Init provider failed! " + e.getMessage());
                        }
                    }
                    postcard.setProvider(instance);
                    postcard.greenChannel();    // Provider should skip all of interceptors
                    break;
                case FRAGMENT:
                    postcard.greenChannel();    // Fragment needn't interceptors
                default:
                    break;
            }
        }
    }
这一步就是:LogisticsCenter (物流中心)根据 Warehouse(仓库)中加载的路由信息来完善PostCard(明信片)。
其中Warehouse中包含了一些路由信息的Map映射,这一部分的关键数据在ARouter初始化时加载(LogisticsCenter#init方法中,利用了注解处理器生成的一些类将数据加载进Warehouse中,可以进去看看加载的逻辑,有助于理解Warehouse中数据的意义)。
class Warehouse {
    // Cache route and metas
    static Map<String, Class<? extends IRouteGroup>> groupsIndex = new HashMap<>();
    static Map<String, RouteMeta> routes = new HashMap<>();

    // Cache provider
    static Map<Class, IProvider> providers = new HashMap<>();
    static Map<String, RouteMeta> providersIndex = new HashMap<>();

    // Cache interceptor
    static Map<Integer, Class<? extends IInterceptor>> interceptorsIndex = new UniqueKeyTreeMap<>("More than one interceptors use same priority [%s]");
    static List<IInterceptor> interceptors = new ArrayList<>();
}
简单说一下其中每个字段的数据:
groupsIndex: 记录了组名 - 组加载类(注解生成)的映射,生成逻辑如下:
/**
 * DO NOT EDIT THIS FILE!!! IT WAS GENERATED BY AROUTER. */
public class ARouter$$Root$$app implements IRouteRoot {
  @Override
  public void loadInto(Map<String, Class<? extends IRouteGroup>> routes) {
    routes.put("activity", ARouter$$Group$$activity.class); //这些class都是注解自动生成的。
    routes.put("main", ARouter$$Group$$main.class);
    routes.put("test", ARouter$$Group$$test.class);
  }
}
routes: 记录了path - RouteMeta的映射,生成逻辑如下:
/**
 * DO NOT EDIT THIS FILE!!! IT WAS GENERATED BY AROUTER. */
public class ARouter$$Group$$activity implements IRouteGroup {
  @Override
  public void loadInto(Map<String, RouteMeta> atlas) {
    atlas.put("/activity/DeviceListActivity", RouteMeta.build(RouteType.ACTIVITY, DeviceListActivity.class, "/activity/devicelistactivity", "activity", null, -1, -2147483648));
  }
}
前面也说过当通过一个path获取不到目标class的时候,就会去加载path对应的组下的所有path信息,就是在这里加载的。
providers : 保存了反射生成的目标实例。我们每次通过navigation获取到的provider对象都是同一个,就是因为这里进行了缓存,保证只有一个实例,单例。
providerIndex: 保存Class对象-RouteMeta的映射。
public class ARouter$$Providers$$app implements IProviderGroup {
  @Override
  public void loadInto(Map<String, RouteMeta> providers) {
    providers.put("com.seewo.swstclient.module.base.api.IApp", RouteMeta.build(RouteType.PROVIDER, App.class, "/main/app", "main", null, -1, -2147483648));
    providers.put("com.seewo.swstclient.module.base.api.connectmode.IConnectModeManager", RouteMeta.build(RouteType.PROVIDER, ConnectModeManager.class, "/main/connectModeManager", "main", null, -1, -2147483648));
  }
}
我们通过navigation获取provider实例的时候传入参数的是Class对象,ARouter.getInstance().navigation(IBInterface.class),这里就是通过这个映射关系,来拿到path的,下一步再根据path拿到具体的实例。
将Postcard信息补充完整后(其实就是拿到了目标Class),接下来就是根据类型来对应做一些操作:
如果是ACTIVITY类型,就利用目标Class做跳转操作。
如果是PROVIDER类型,就通过反射获取目标Class的实例。
_ARouter# _navigation()
private Object _navigation(final Context context, final Postcard postcard, final int requestCode, final NavigationCallback callback) {
        final Context currentContext = null == context ? mContext : context;

        switch (postcard.getType()) {
            case ACTIVITY:
                // Build intent
                final Intent intent = new Intent(currentContext, postcard.getDestination());
                intent.putExtras(postcard.getExtras());

                // Set flags.
                int flags = postcard.getFlags();
                if (-1 != flags) {
                    intent.setFlags(flags);
                } else if (!(currentContext instanceof Activity)) {    // Non activity, need less one flag.
                    intent.setFlags(Intent.FLAG_ACTIVITY_NEW_TASK);
                }

                // Set Actions
                String action = postcard.getAction();
                if (!TextUtils.isEmpty(action)) {
                    intent.setAction(action);
                }
                startActivity(requestCode, currentContext, intent, postcard, callback);

                break;
Over.